Adding Internal link to webpage, document, Image
Internal links are links to your content that you create from within Cascade. You can link to documents, files and webpages internally. Anchor links are also considered internal links.
Accessibility Tip
Make sure that the link text is descriptive. use descriptive link text. Read More and Click Here link text isn’t very helpful to users with assistive technology. Instead of a link like Read more about Cascade 2017 conference, create a link like Read more about Cascade 2017 conference.
Create an internal link
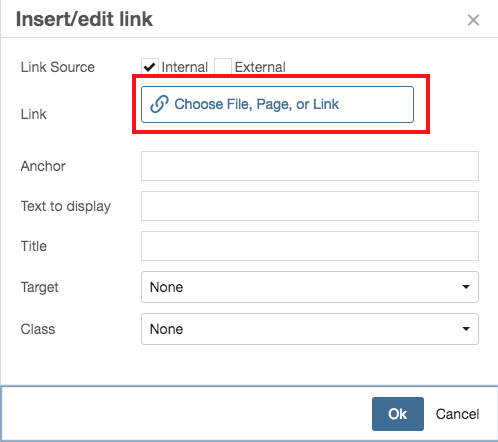
- Select the text that you want to link to and find the link icon in WYSIWYG toolbar and click on it. This opens another window.

- Click “Choose File, Page, or Link” option to navigate to the appropriate asset. Once you have located the asset to which you wish to link, click Ok button. This will place the link inside your webpage. If you’re linking to a document, we recommend adding document title in “Title” field.
- After you've made your changes, you should save your changes to Cascade and publish to the live site.
Create Anchor Links
Anchor link is an invisible bookmark on your page. When pages have a large amount of text, such as an FAQ page, it is easier to break up the page using anchors.
Note: In general, you can create anchor links within the same WYSIWYG ( the anchor and the link has to live within the same WYSIWYG).
To create an anchor link:
- Place your cursor where you want the anchor marker to be located.

- Next, click the Anchor icon. This will open a new window.
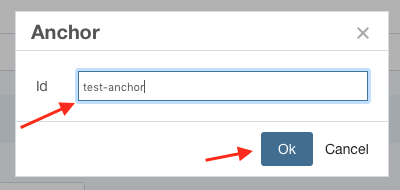
- Next to the Id field, type a short name for your anchor. Use dashes instead of spaces for longer ids.
- After you have chosen a name, click Ok. You will now see a small anchor image where you have placed your anchor. This anchor image is only visible within Cascade – this image will not appear on the published page.

- Select the text that you want to link to the anchor and go to the link icon.
- Type the anchor name into the Anchor field. You may use this for the page you are currently editing, or a page elsewhere on your site. If you wish to add an anchor to another page on your site, first choose the page you will link to (as described above). Then, type the appropriate name into the Anchor field.
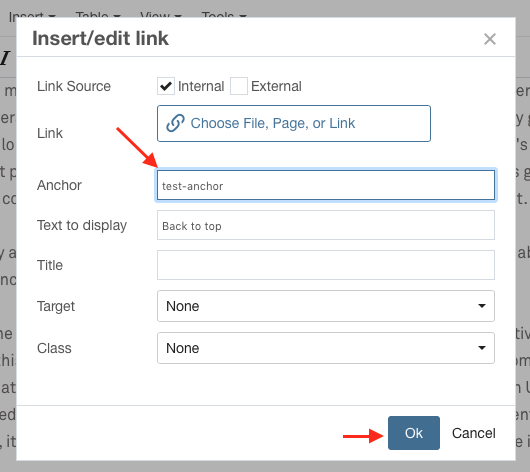
- Click Ok to place the link in your webpage.
- After you've made your changes, you should save your changes to Cascade and publish to the live site.
Adding External link to a website or email address
External links are links to pages that are not part of your website in Cascade. If you cannot link to a page via Cascade using the folder tree, it’s considered external. Link to an email address is also considered an external link.
Accessibility Tip
All external links should open in the same tab/window. Users with screen reading devices feel disoriented when external links open in a new tab. There’re a few exceptions when you can do that, for example – if users need to reference instructions on another webpage while filling out an online form, you could open the instructions in a new tab.
Link to an external webpage
- Select the text that you want to link to and find the link icon in WYSIWYG toolbar and click on it. This opens another window.
- To create an external link, uncheck Internal and check External checkbox.
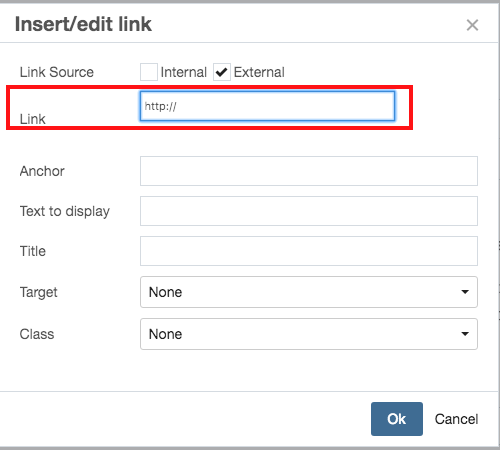
- In the “Link” field, add the external URL. Make sure that the URL starts with http:// or http://. Make sure to delete the prefilled http if you’re copying URL from the browser address bar and pasting it here. You can add additional information about the external link in the “Title” field. Then, type or paste the link to the external website into the Link field.
- Once you have added the link, click Ok button. This will place the link inside your webpage.
- After you've made your changes, you should save your changes to Cascade and publish to the live site.
Link to an email address
- Select the email address that you want to link to and find the link icon in WYSIWYG toolbar and click on it. This opens another window.
- To create an external link, uncheck Internal and check External checkbox.
- In the “Link” field, erase http:// and type mailto:, then type the email address. For example, a mailto link should look like this - mailto:helpdesk@shuiis.com
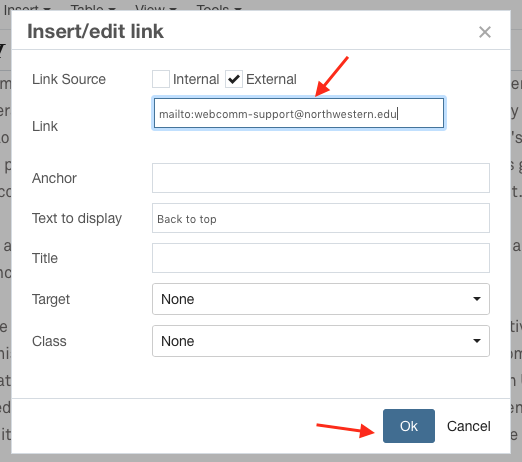
- Once you have added the link, click Ok button. This will place the link inside your webpage.

